AI Avatar pricing allows you to create different payment plans for users who want to interact with your AI Avatar. You can set up Free or One-time, with different limits, features, and durations.
Setting up pricing helps you:
Generate revenue from your AI Avatar
Control usage with message and call limits
Offer multiple value tiers for different learners
Build a sustainable business model
How to Access AI Avatar Pricing Settings
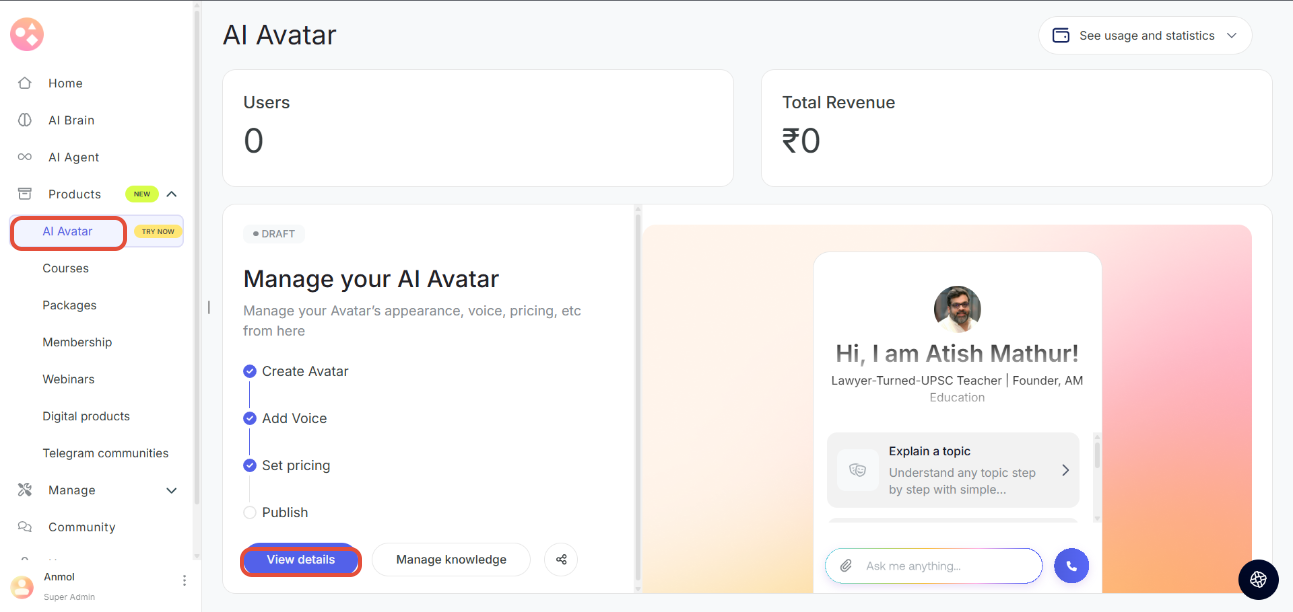
Step 1: From the left navbar, click Products then AI Avatar
Step 2: Click on View Details.
Step 3: From Manage, select Pricing.
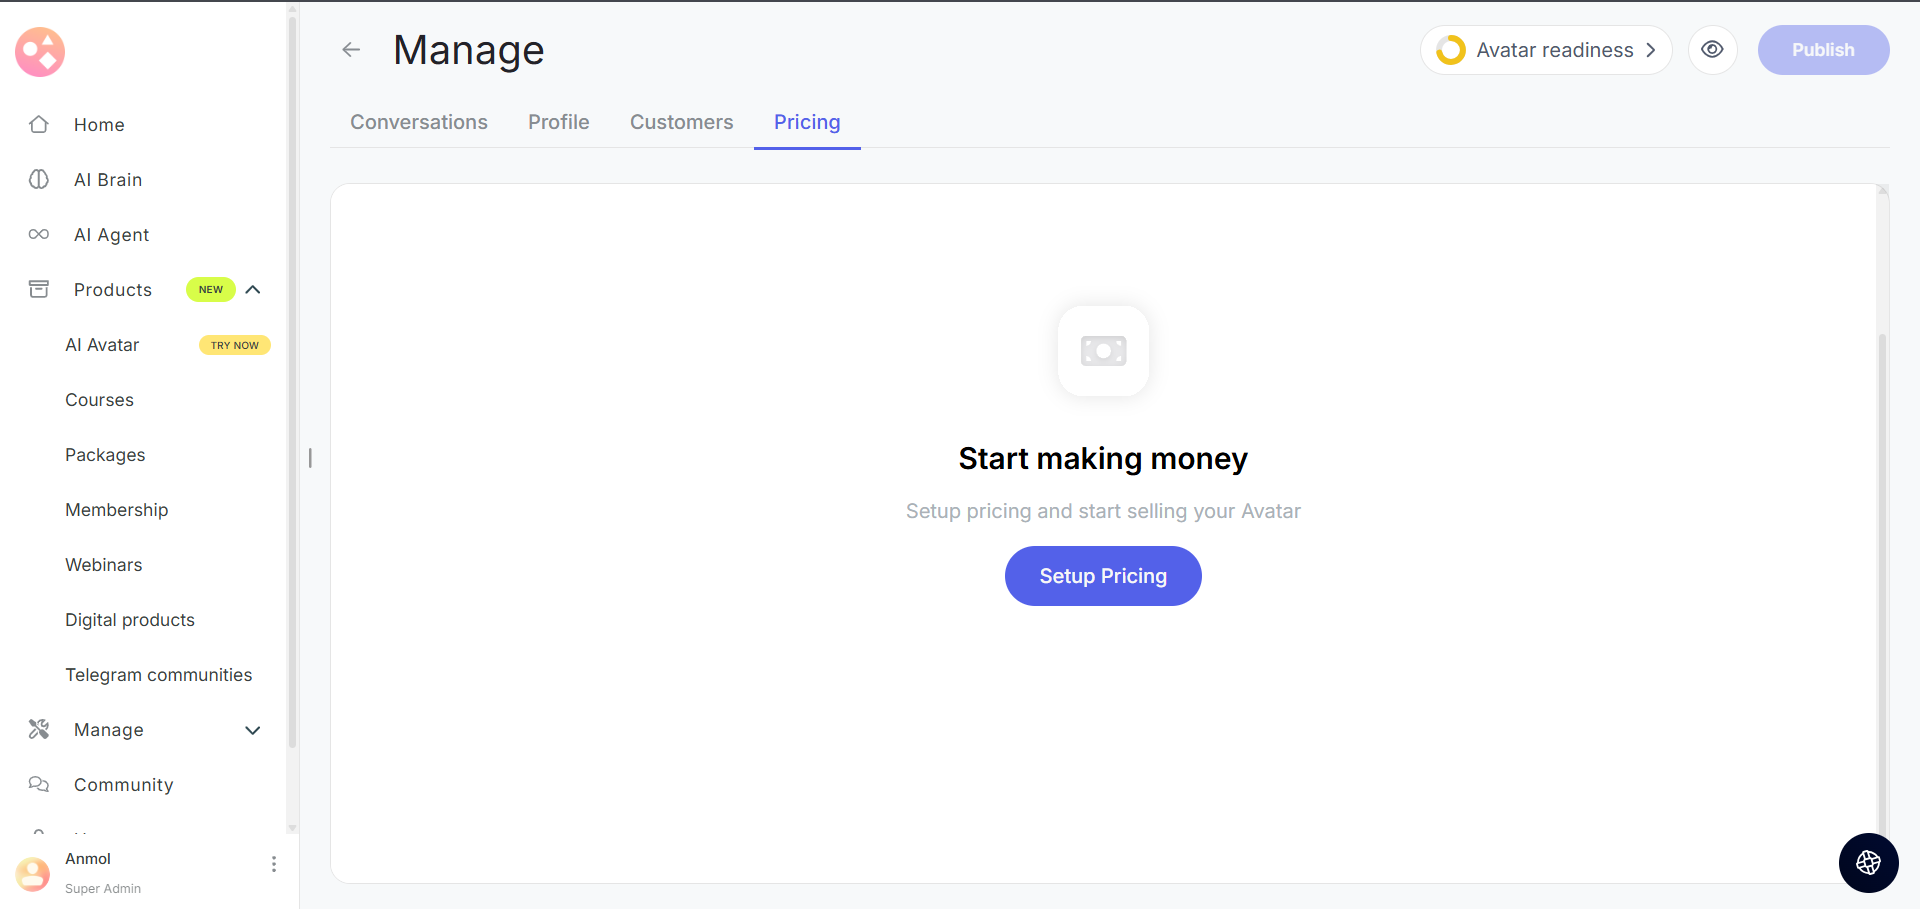
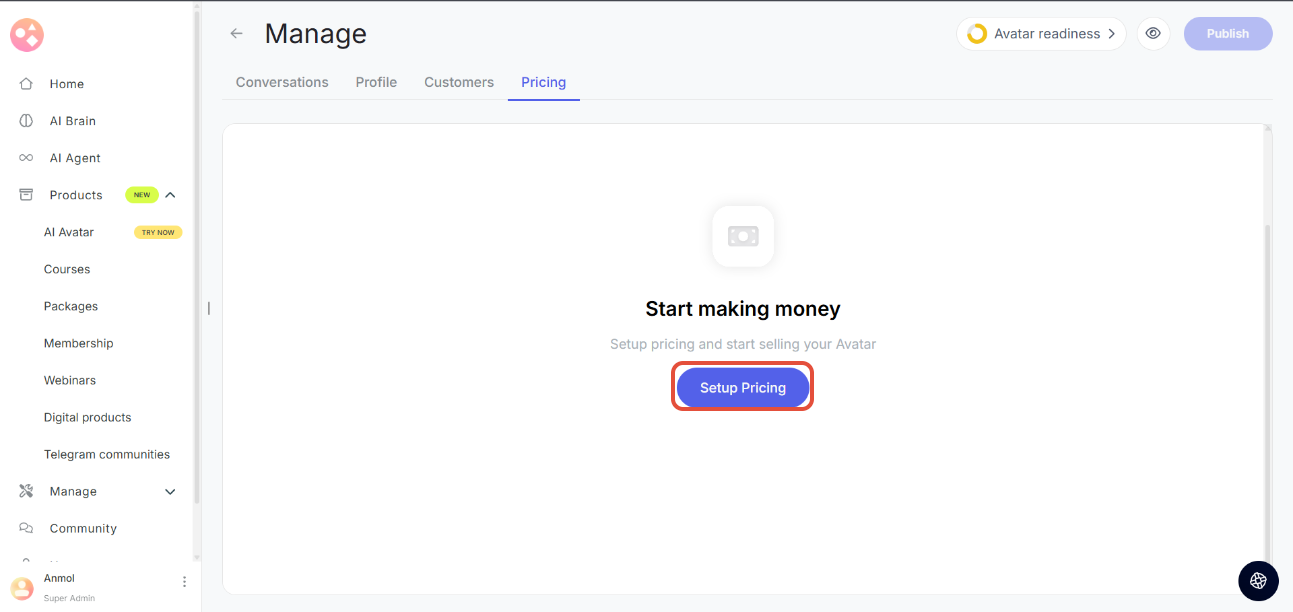
Step 4: Click Setup Pricing to create your first pricing plan.
Step 5: Enter the plan name
Clear, intuitive names (like Basic Access, Premium Chat, or Unlimited Plan) instantly communicate value. A confusing or vague name can discourage users because they don’t know what they’re buying. Think of this as your product’s headline. 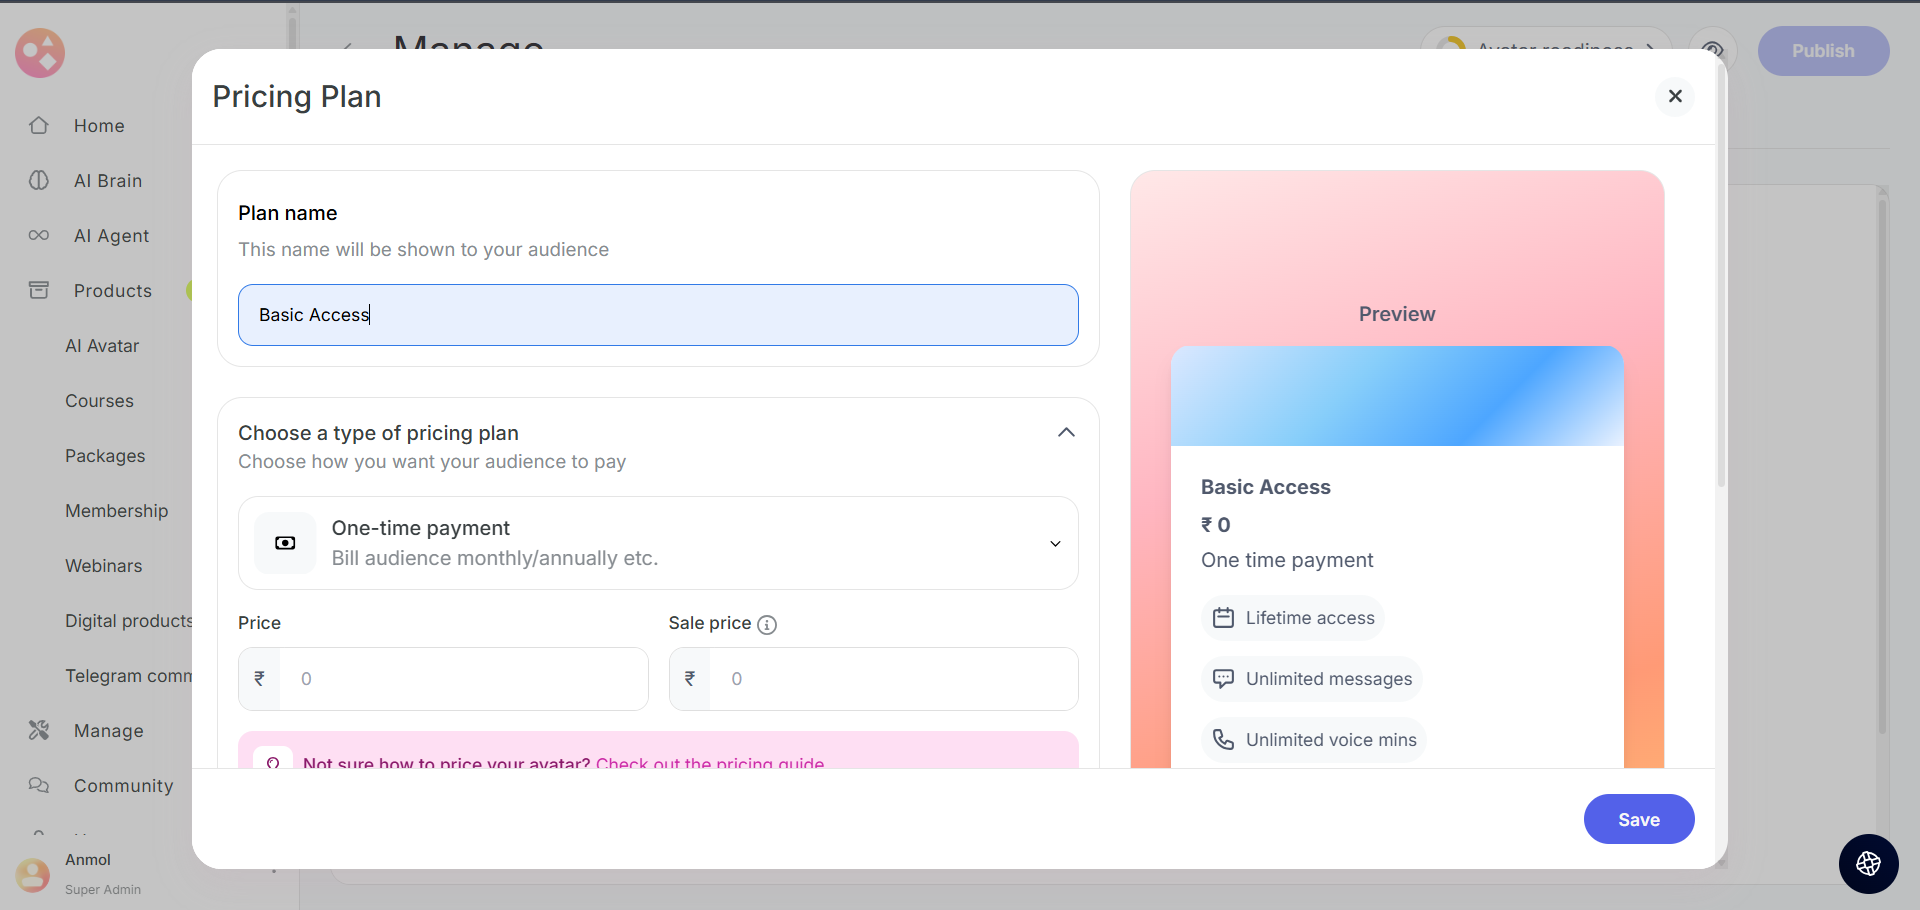
Step 6: Choose your pricing plan type from the dropdown
You’ll see two options:
Free Plan → Great for onboarding and trust-building. Lets users “try before they buy.”
One-time Payment → Simplifies purchase decisions by offering lifetime or fixed-period access. Users feel secure knowing there are no hidden recurring charges.
This choice sets the foundation for how people will perceive and commit to your Avatar.

Step 7: Set Your Pricing
Effective Price: The actual cost of the plan.
Sale Price : Creates urgency with discounts (boosting conversions during launches or campaigns).
Proper pricing impacts not just revenue but also how premium your Avatar feels.
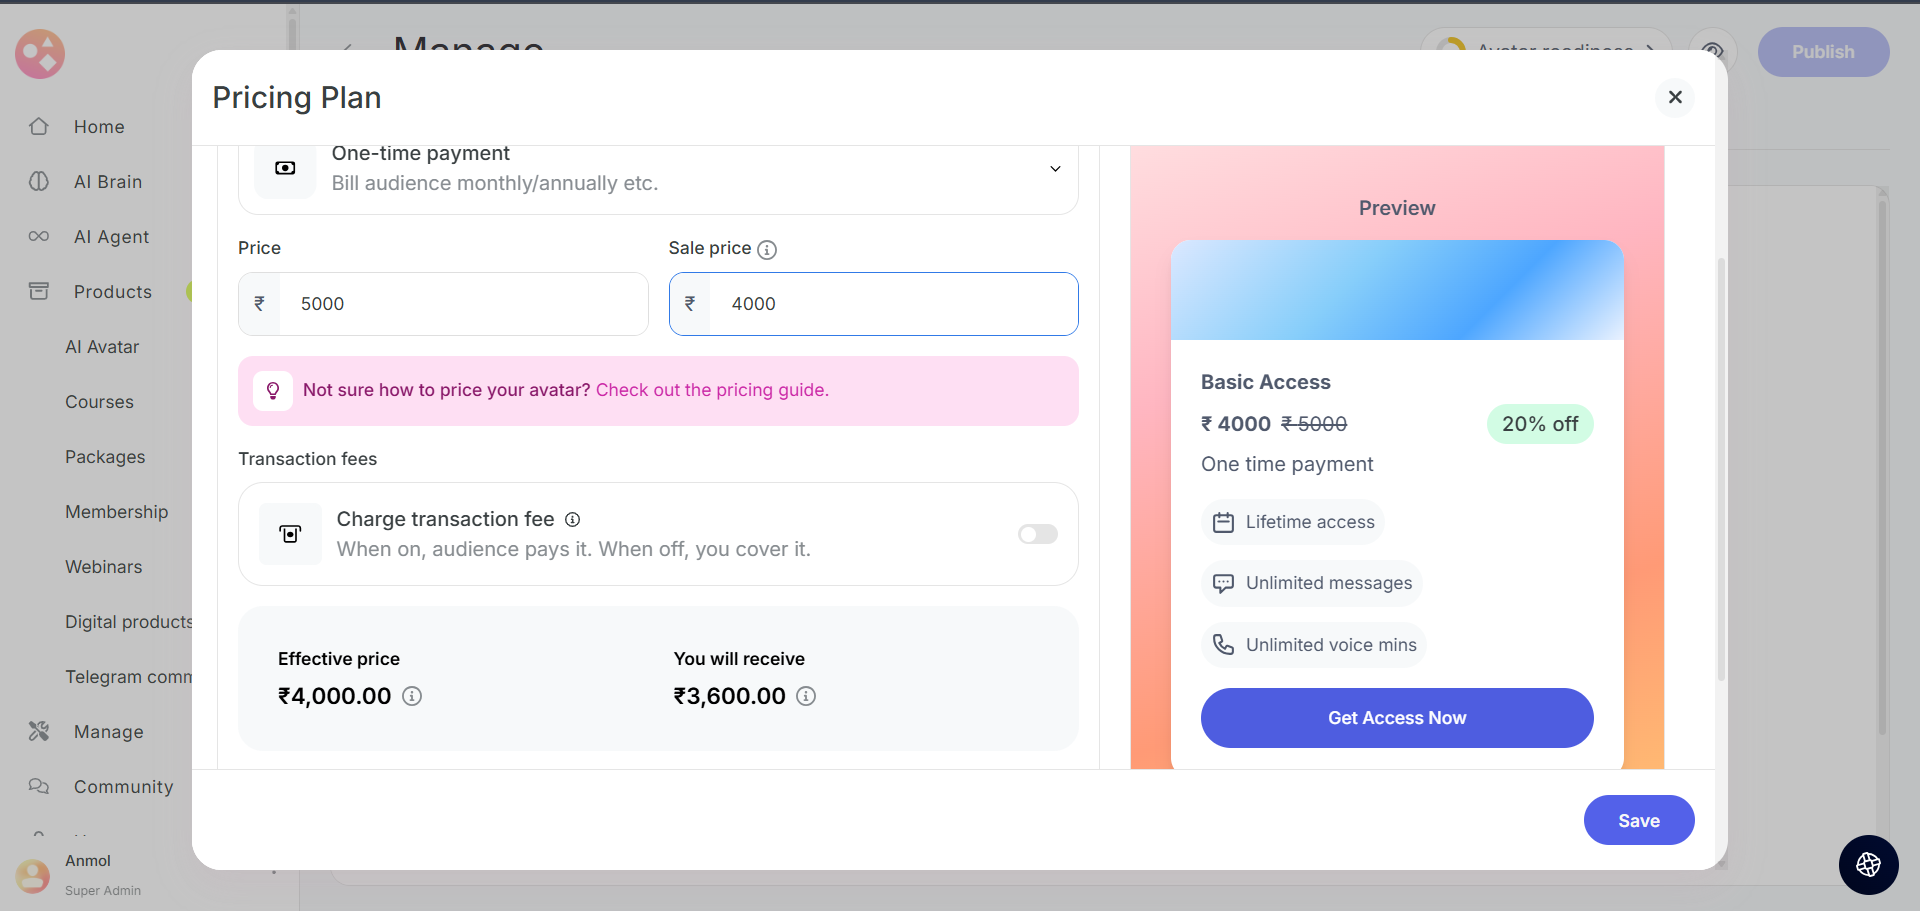
Not sure how to price your avatar , check out this help article
Step 8: Configure Transaction Fees
Toggle Charge Transaction Fee:
ON → User pays the fee (recommended).
OFF → You absorb the fee. Creates a smoother buying experience (no extra charges at checkout).
This decision affects profitability and user trust — hidden costs can reduce conversions.
Step 9: Configure Plan Duration
Choose one:
Days or till date
Different durations suit different user preferences. Longer plans improve customer lifetime value.
Step 10: Customize Button Text
Change default “Get Access Now” to something clearer
Personalized buttons can increase conversions.
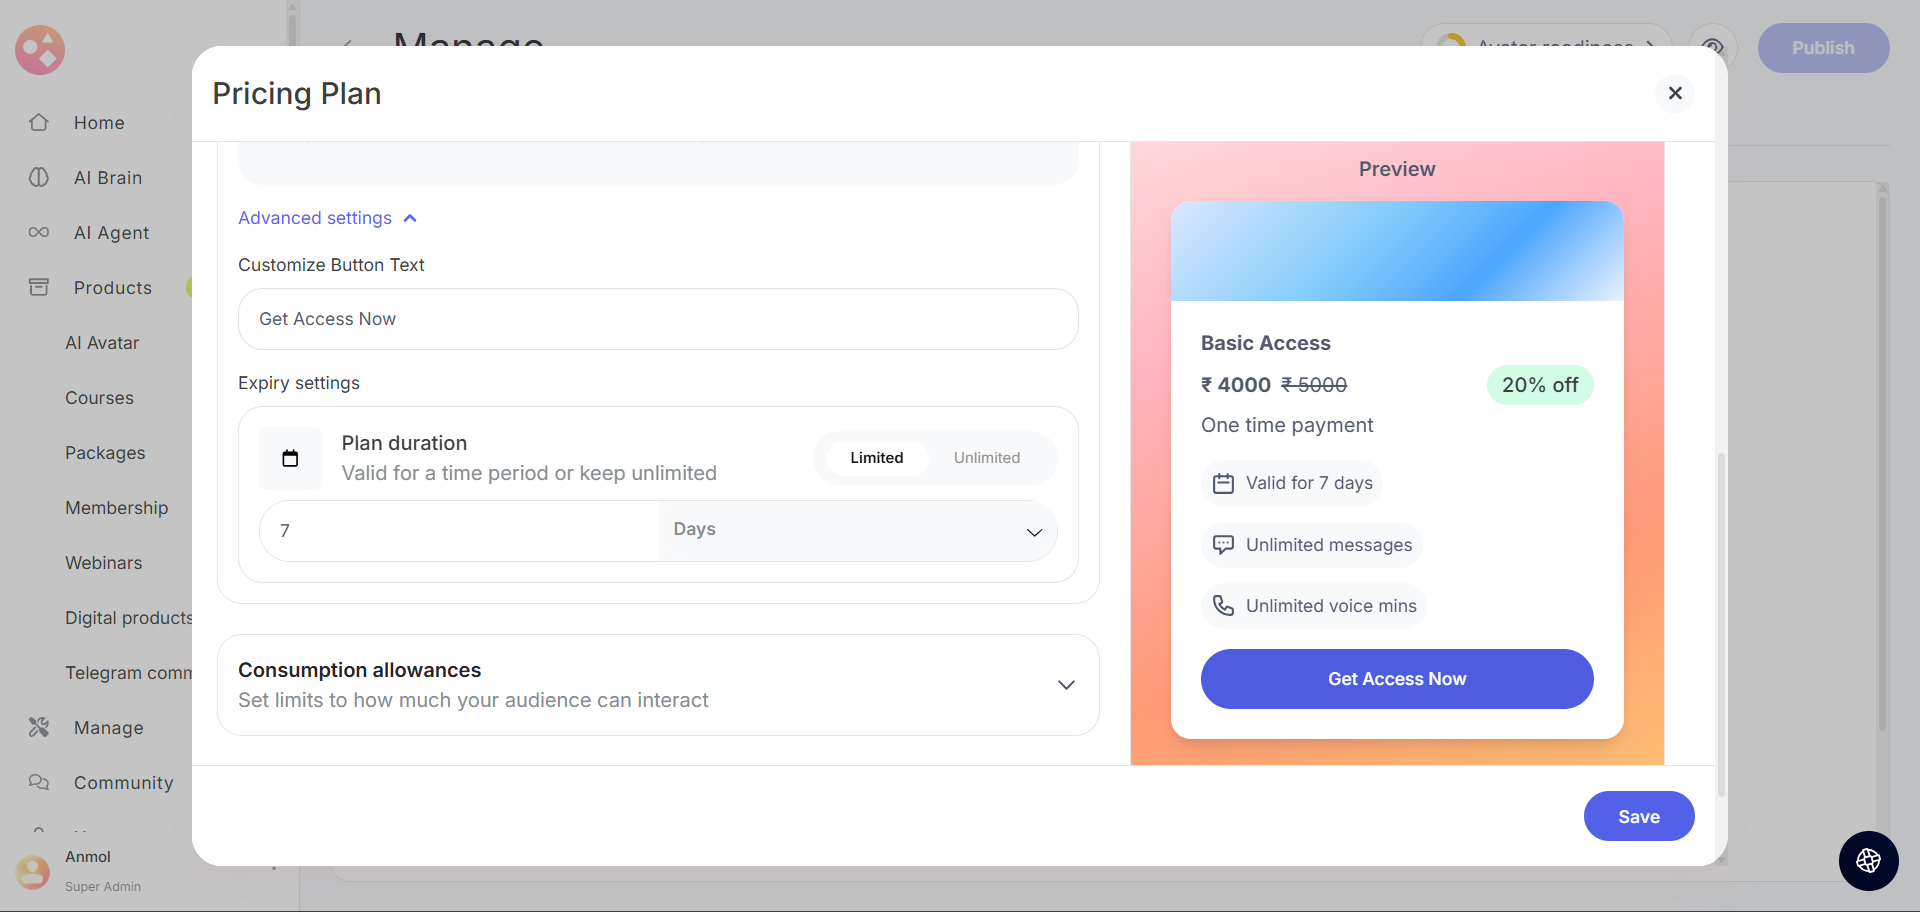
Step 11: Set Usage Limits (Consumption Allowances)
Messages: Limited (set number) or Unlimited.
Voice Call Minutes: Limited (set minutes) or Unlimited.
Controls costs, creates different tiers, and encourages upgrades.
To know how much will be consumed from your messages and voice calls limits, check out this help article.
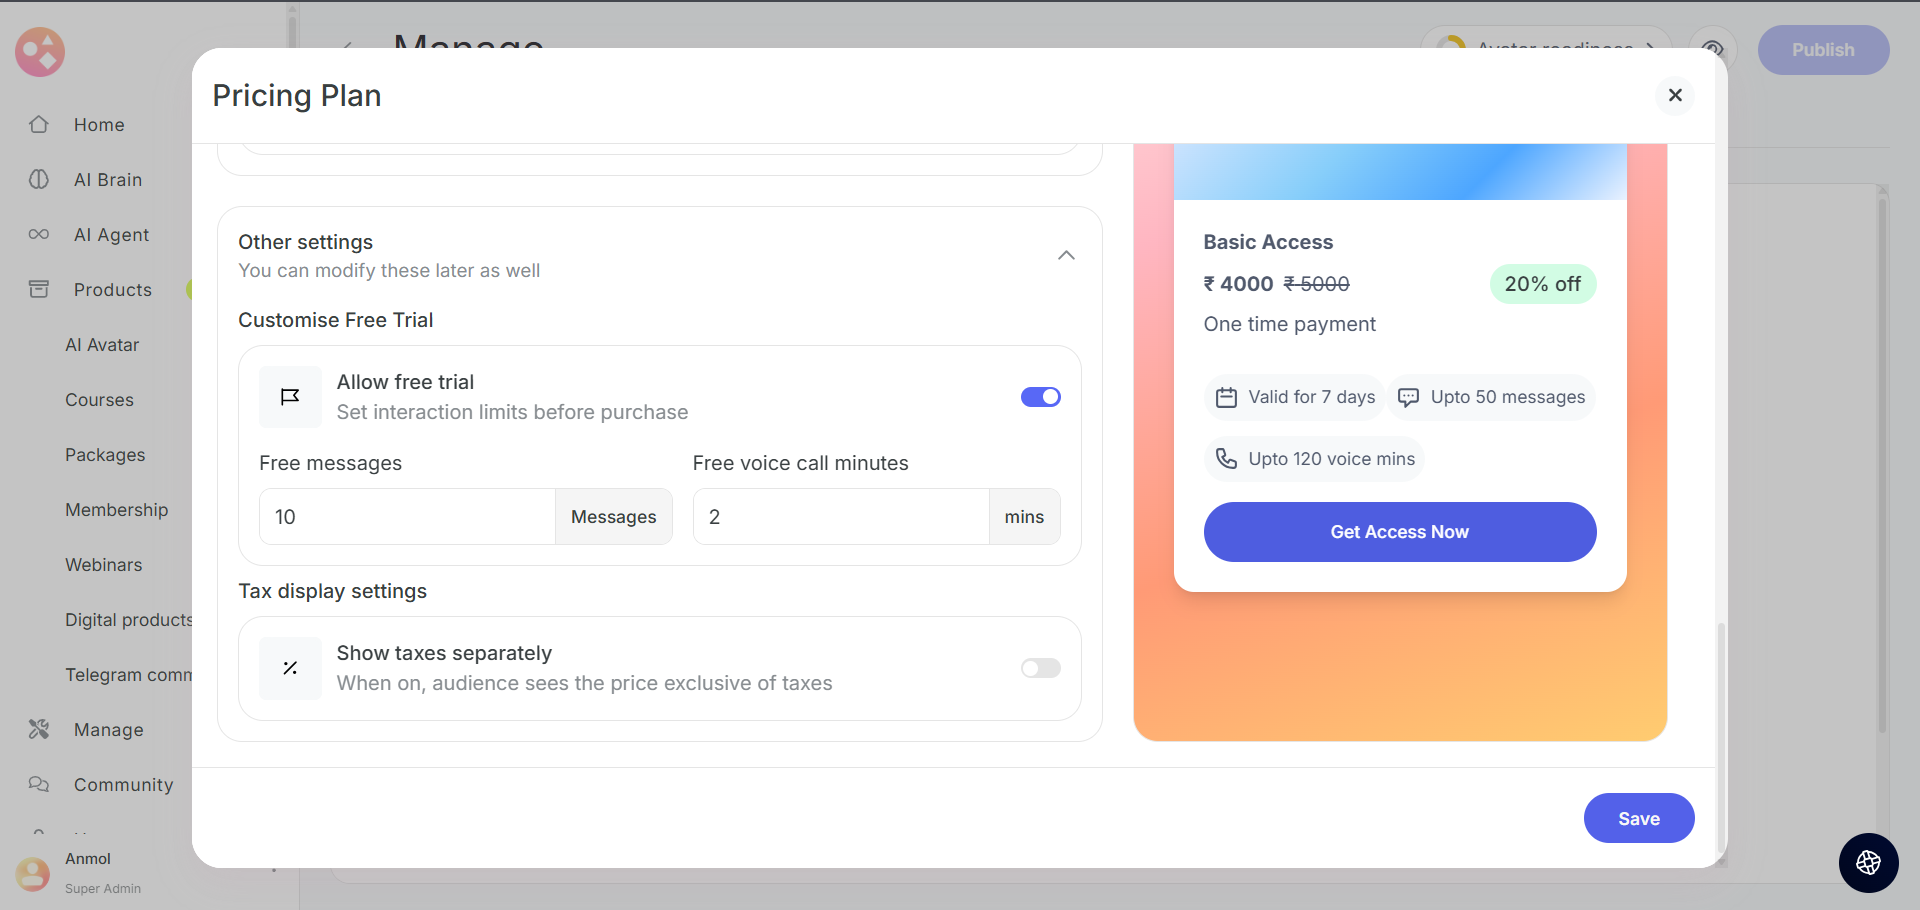
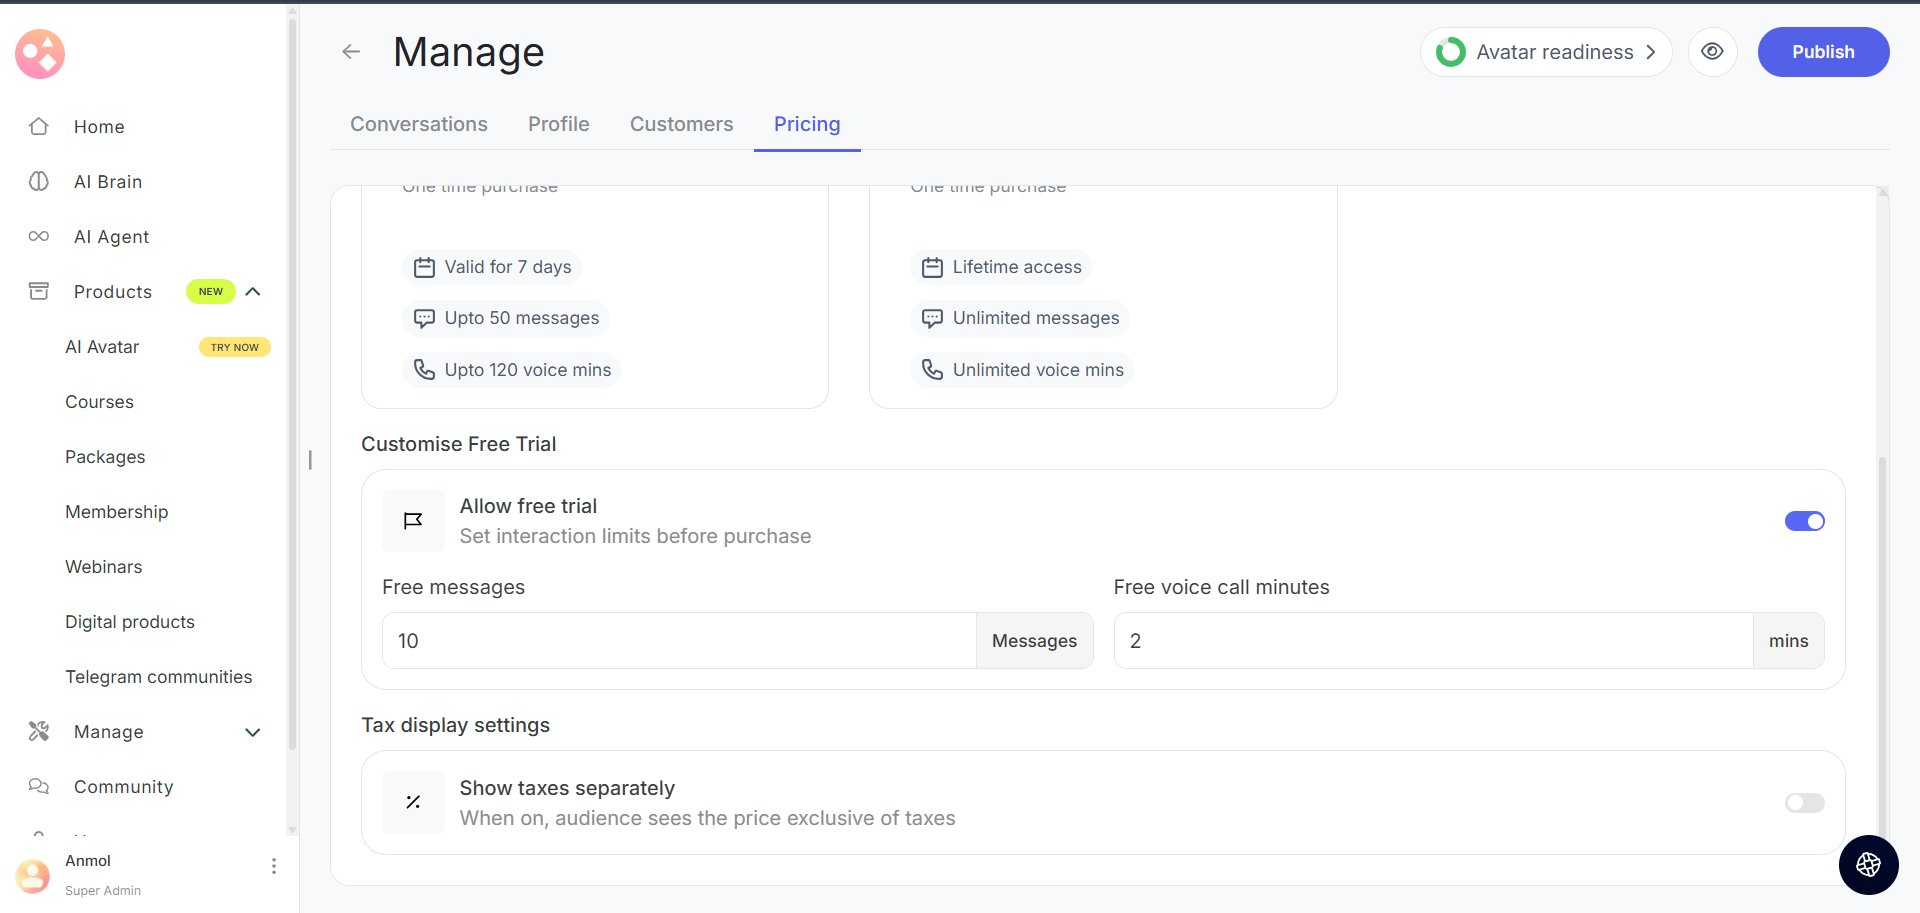
Step 12: Setting Up Free Trials
At the bottom of the pricing plan page, you’ll find Customize Free Trial options:
Allow Free Trial Toggle → Turn ON to let users try your Avatar before purchase.
Set limits for free messages and call minutes.
Free trials give users a taste of your AI Avatar’s value, which often leads to higher conversion rates when they upgrade to a paid plan.
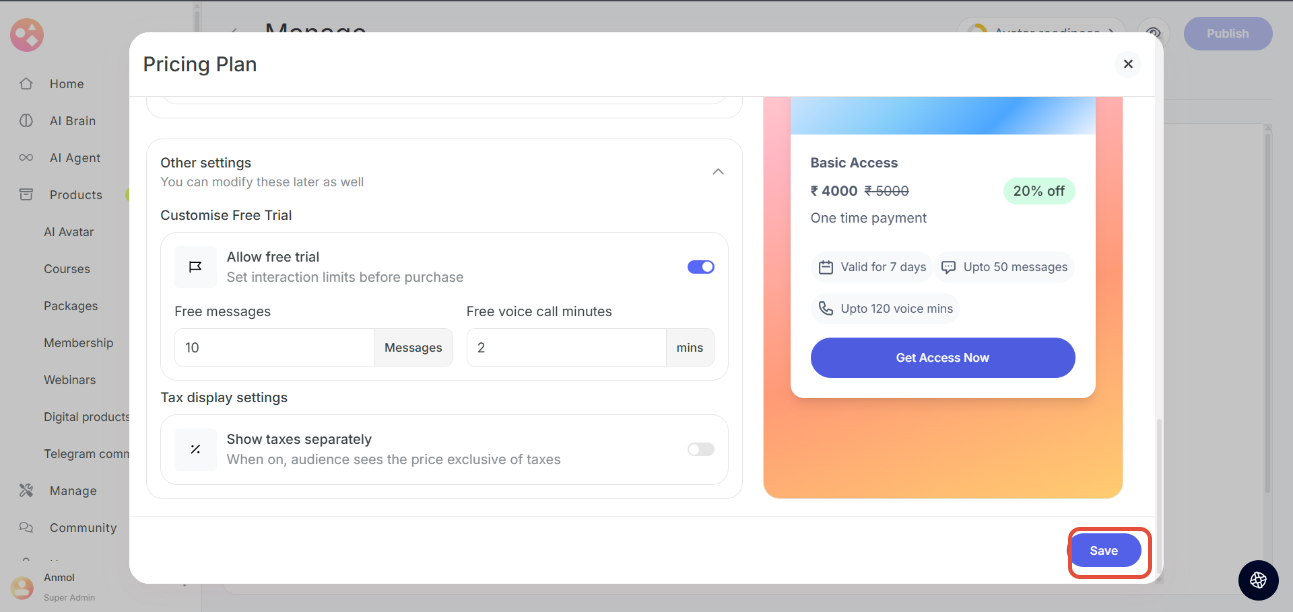
 Step 13: Review and Save
Check plan name, price, allowances, and duration from right side
Click Save to publish your pricing plan.
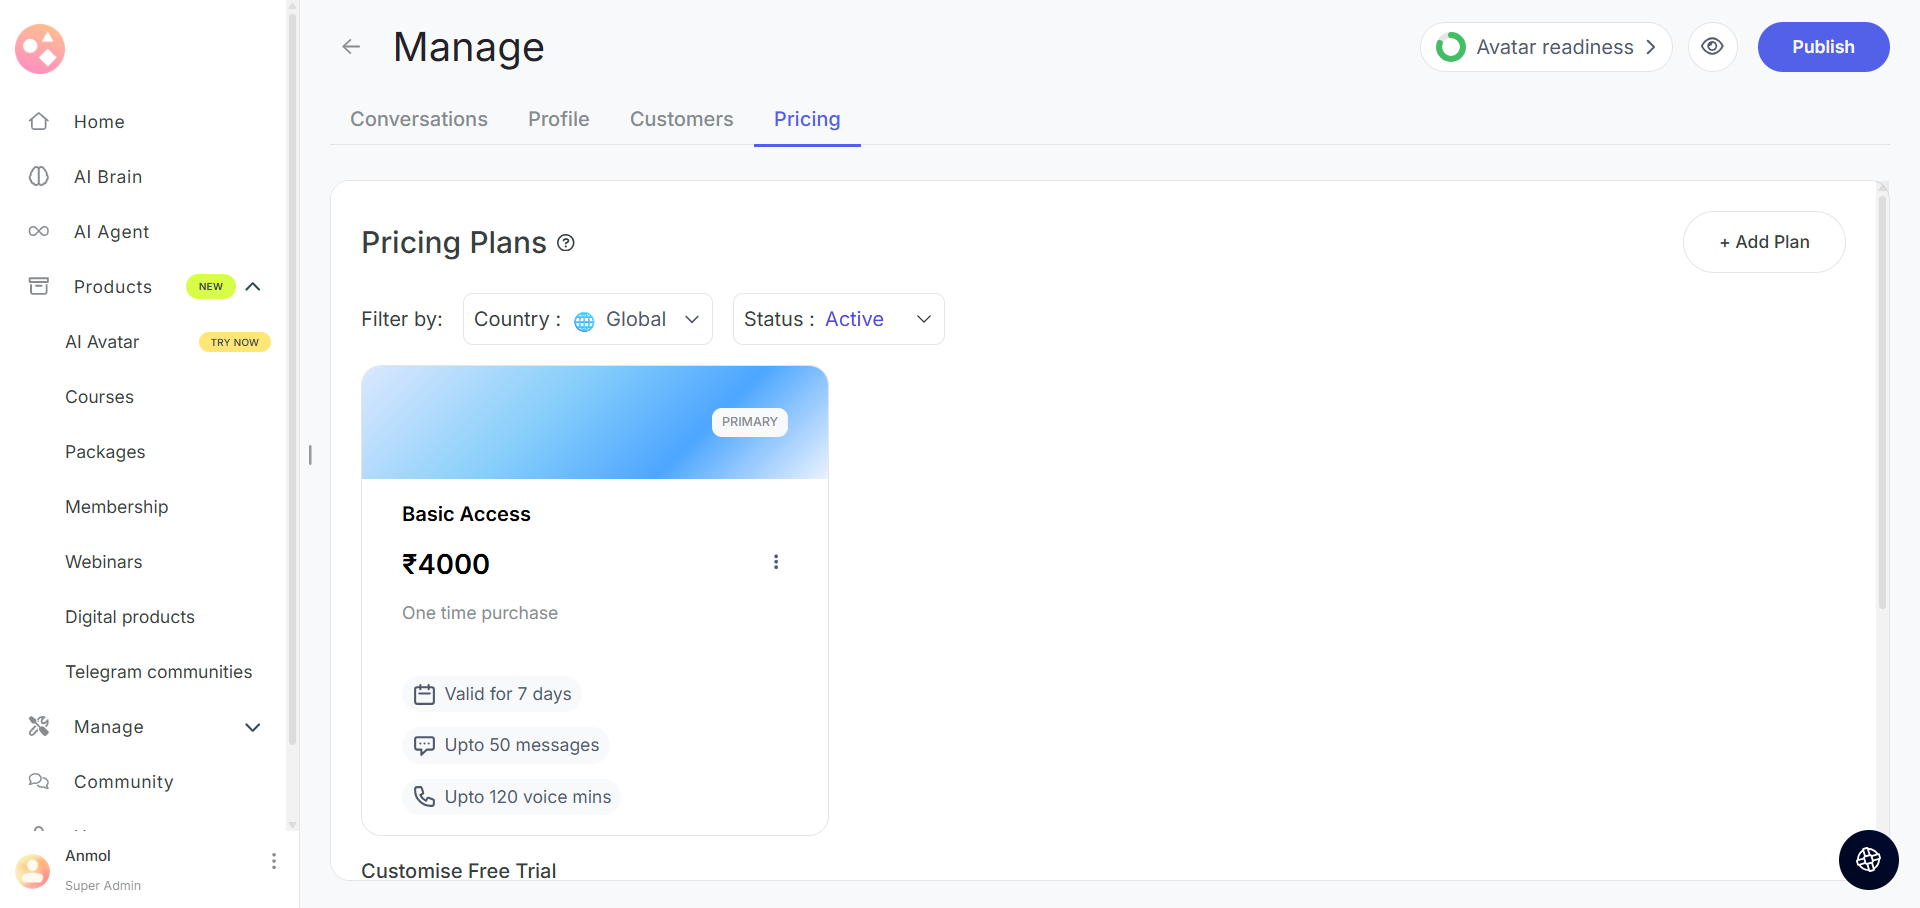
Managing Your AI Avatar Pricing Plans
Once you’ve created your pricing plans, they will be displayed as cards under the Pricing Plans section. Each plan card shows:
Plan Name and Type (e.g., Free Plan, One-Time Purchase)
Price displayed prominently
Validity Period (e.g., “Valid for 7 Days”)
Usage Limits (messages and voice minutes included)
PRIMARY Badge for your main recommended plan
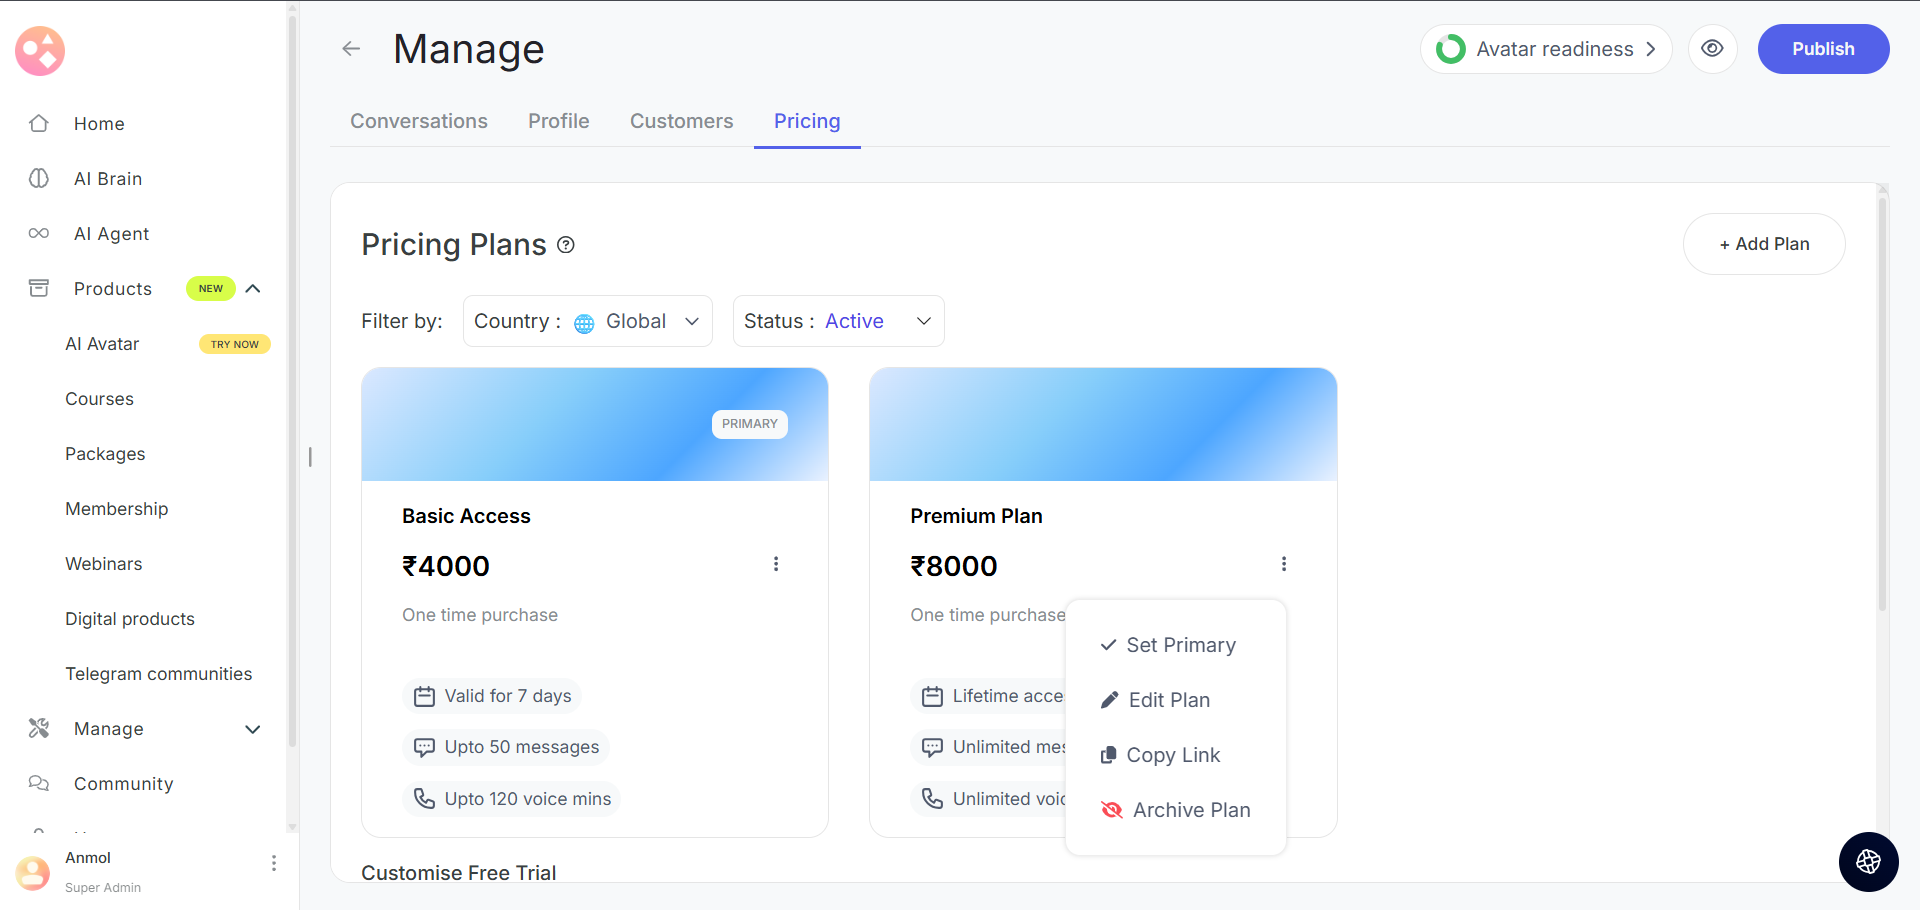
Plan Management Options
For every plan you’ve created, you can click the three dots (⋮) menu to access management actions:
1. Set Primary
Mark a plan as your primary/recommended option.
The chosen plan will be highlighted with a PRIMARY badge.
Highlighting one plan helps guide users toward the best option and reduces decision fatigue, often improving conversion rates.
2. Edit Plan
Update any detail of your existing plan — pricing, name, duration, usage limits, or currency.
All updates take effect immediately for new purchases.
Regularly optimizing plans based on performance and user feedback ensures your pricing remains competitive and attractive.
3. Copy Link
Generate a direct purchase link for a specific plan.
Share it in marketing campaigns, emails, or social media promotions.
Direct links reduce user friction and increase conversion rates by taking users straight to checkout.
4. Archive Plan
Hide a plan from new users without permanently deleting it.
Archived plans won’t be visible for purchase but remain accessible to existing users.
Archiving keeps your offerings clean while preserving historical data and ensuring current customers retain their benefits.
Setting Up Free Trials
At the bottom of the pricing page, you’ll find Customize Free Trial options:
Allow Free Trial Toggle → Turn ON to let users try your Avatar before purchase.
Set limits for free messages and call minutes.
Free trials give users a taste of your AI Avatar’s value, which often leads to higher conversion rates when they upgrade to a paid plan.
Best Practices for AI Avatar Pricing
Start Simple: Launch with 2–3 clear tiers (e.g., Free, Basic, Premium) instead of overwhelming users with too many choices.
Value-Based Pricing: Price according to the expertise, convenience, or personalization your AI Avatar provides.
Test and Iterate: Track signups, churn, and user behavior. Adjust pricing based on data and feedback.
Communicate Clearly: Show exactly what’s included in each plan. Use the preview feature to confirm how it appears to users.
You’ve now set up pricing for your AI Avatar! Learners will see the available plans and choose the one that fits them best.
Was this article helpful?
That’s Great!
Thank you for your feedback
Sorry! We couldn't be helpful
Thank you for your feedback
Feedback sent
We appreciate your effort and will try to fix the article