This article is a step-by-step guide to understanding and setting up different pricing plans for your Telegram communities on Graphy. Whether you want to offer free access, charge a one-time fee, or create recurring subscription revenue, this guide will walk you through every option.
Note: This article assumes you have already connected your Telegram account with Graphy and added the Graphy bot to your channels. If you haven't done this yet, please follow our guide: How to create and set your Telegram Community
Understanding Pricing Plans
After connecting your Telegram account and linking the Graphy bot to your channels, you'll reach the pricing setup section where you can choose how to monetize your community.
When monetizing your Telegram community on Graphy, you have three main pricing options to choose from:
1. Free Plan - Give free access to your community for a limited time or lifetime
2. One-time Payment - Charge a single fee for access (either time-bound or lifetime)
3. Subscription - Set up recurring payments where members pay regularly (this creates recurring revenue)
Pricing Plan Options
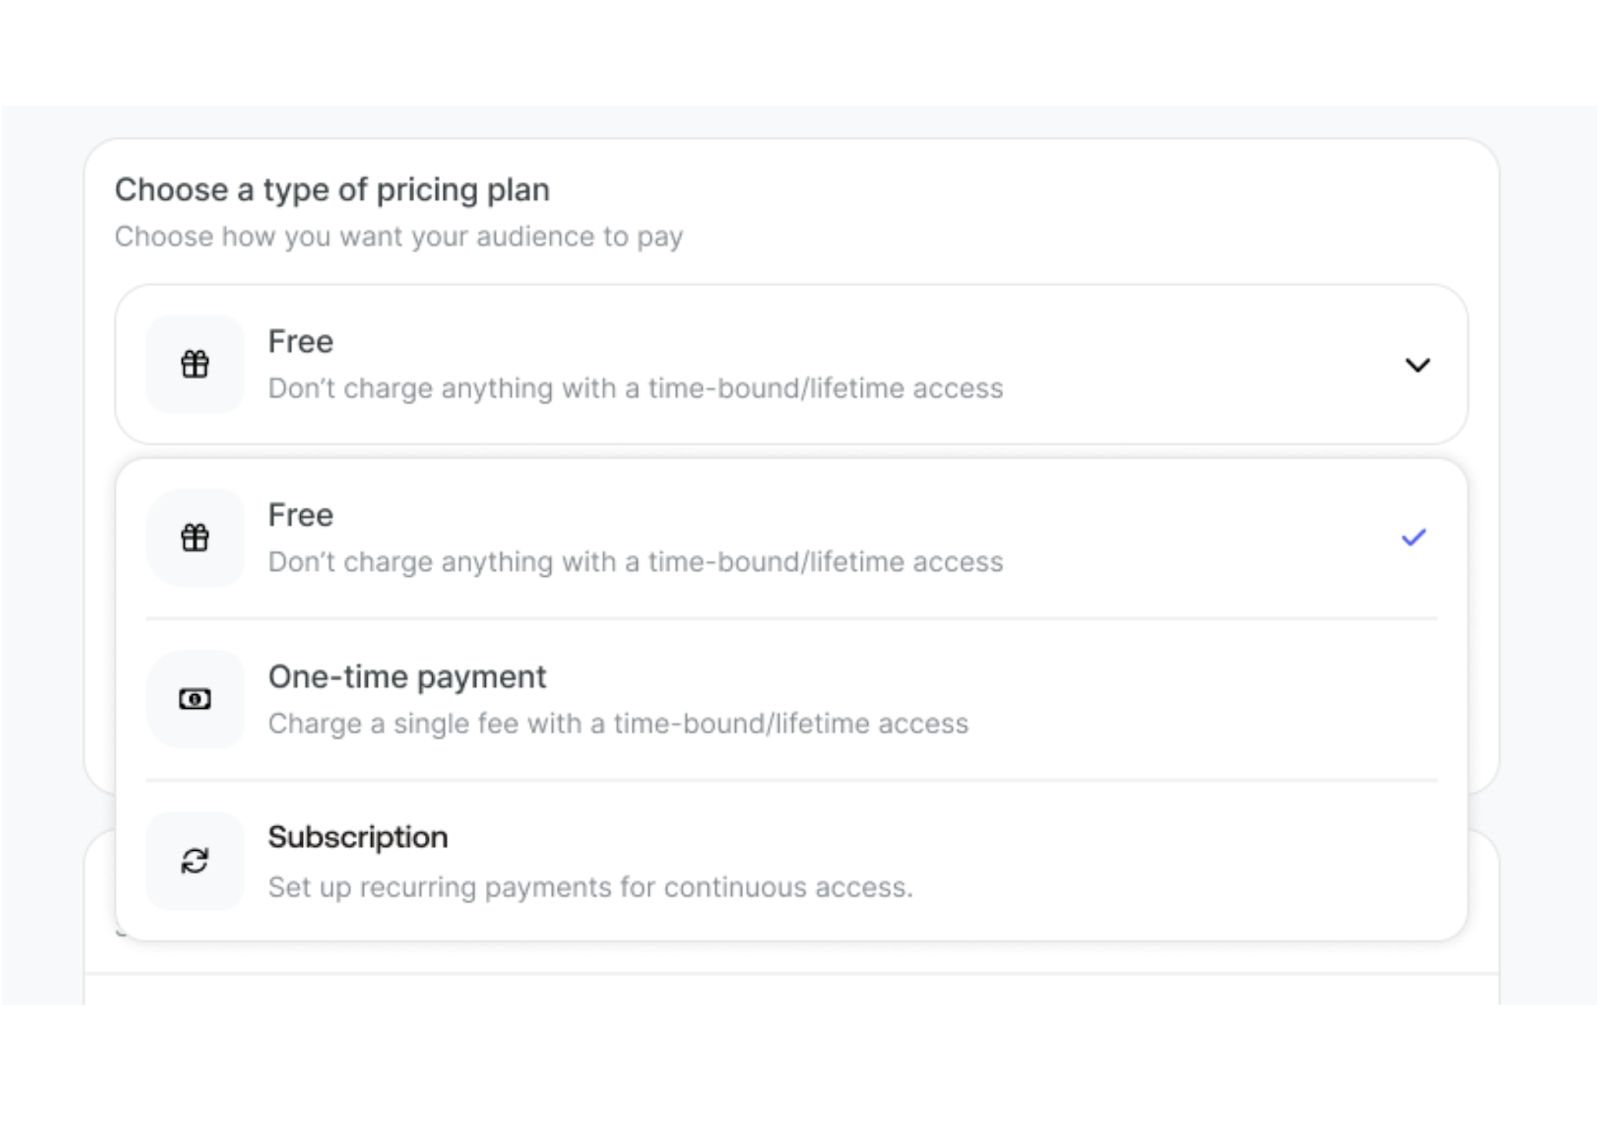
When you click on "Choose a type of pricing plan", you'll see three options:
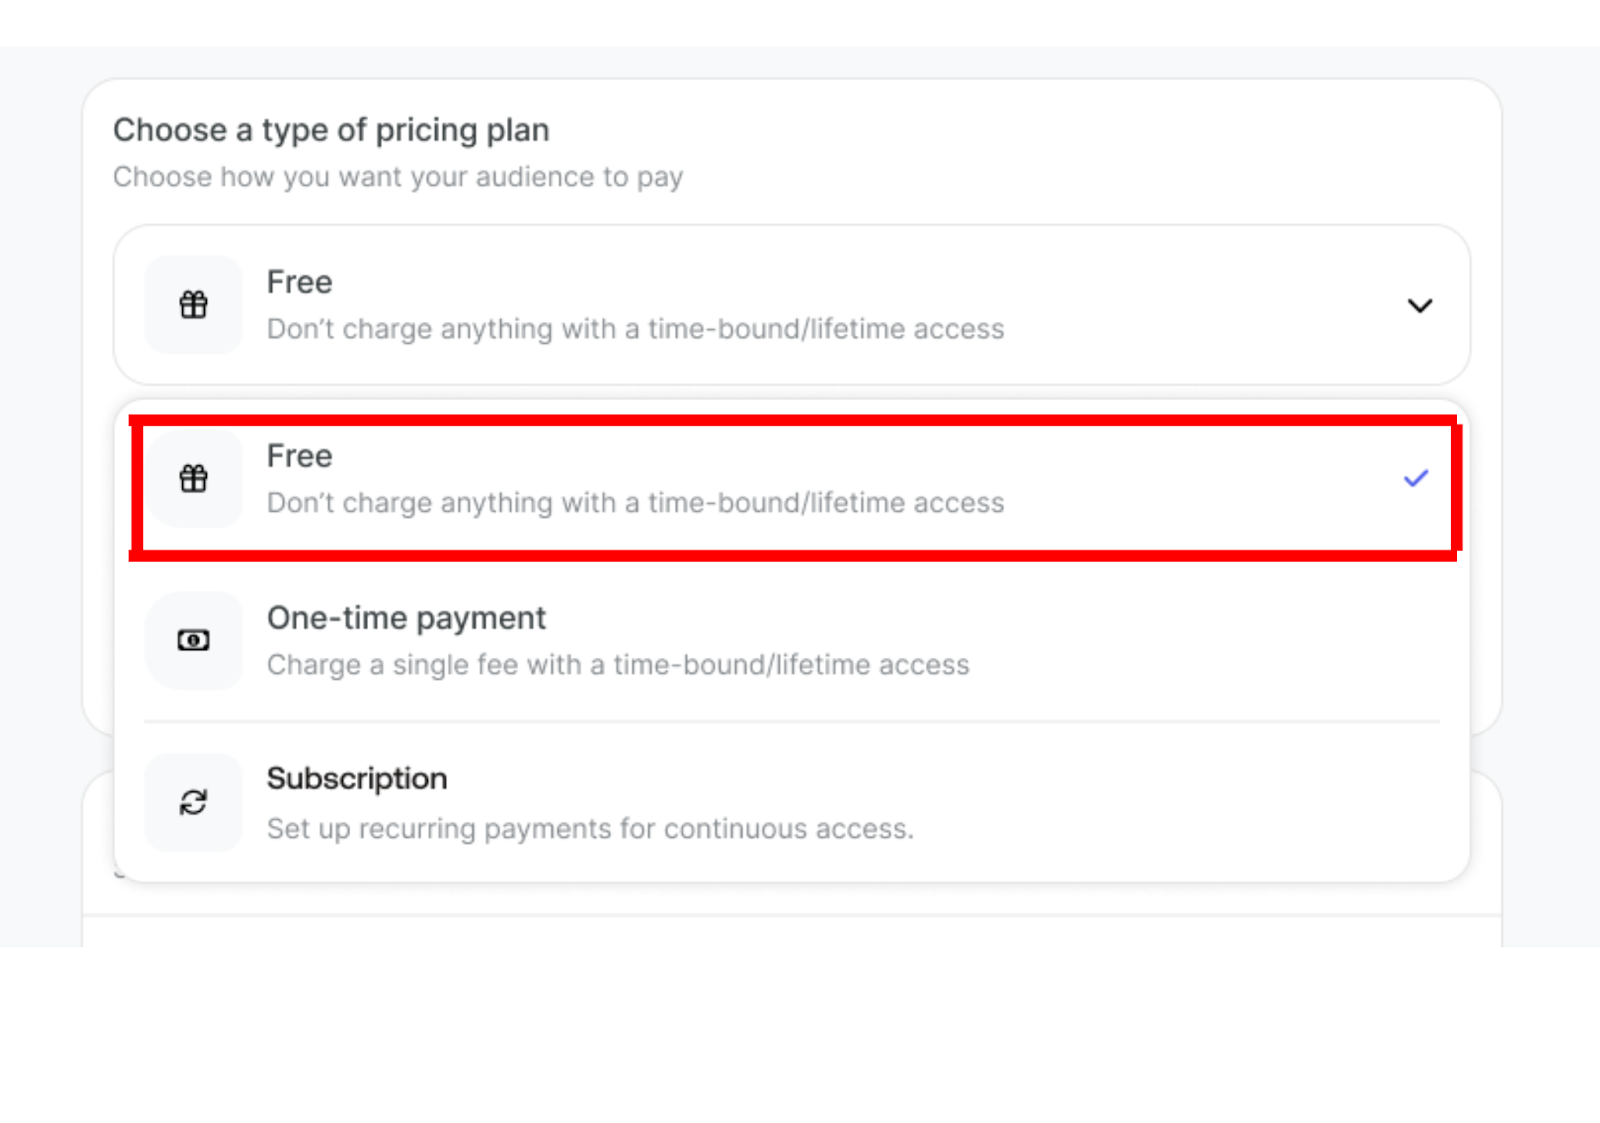
Option 1: Free
Description: Don't charge anything with a time-bound/lifetime access
Use this when you want to:
Build an initial audience
Offer trial periods
Create a free tier alongside paid tiers
Build community without monetization
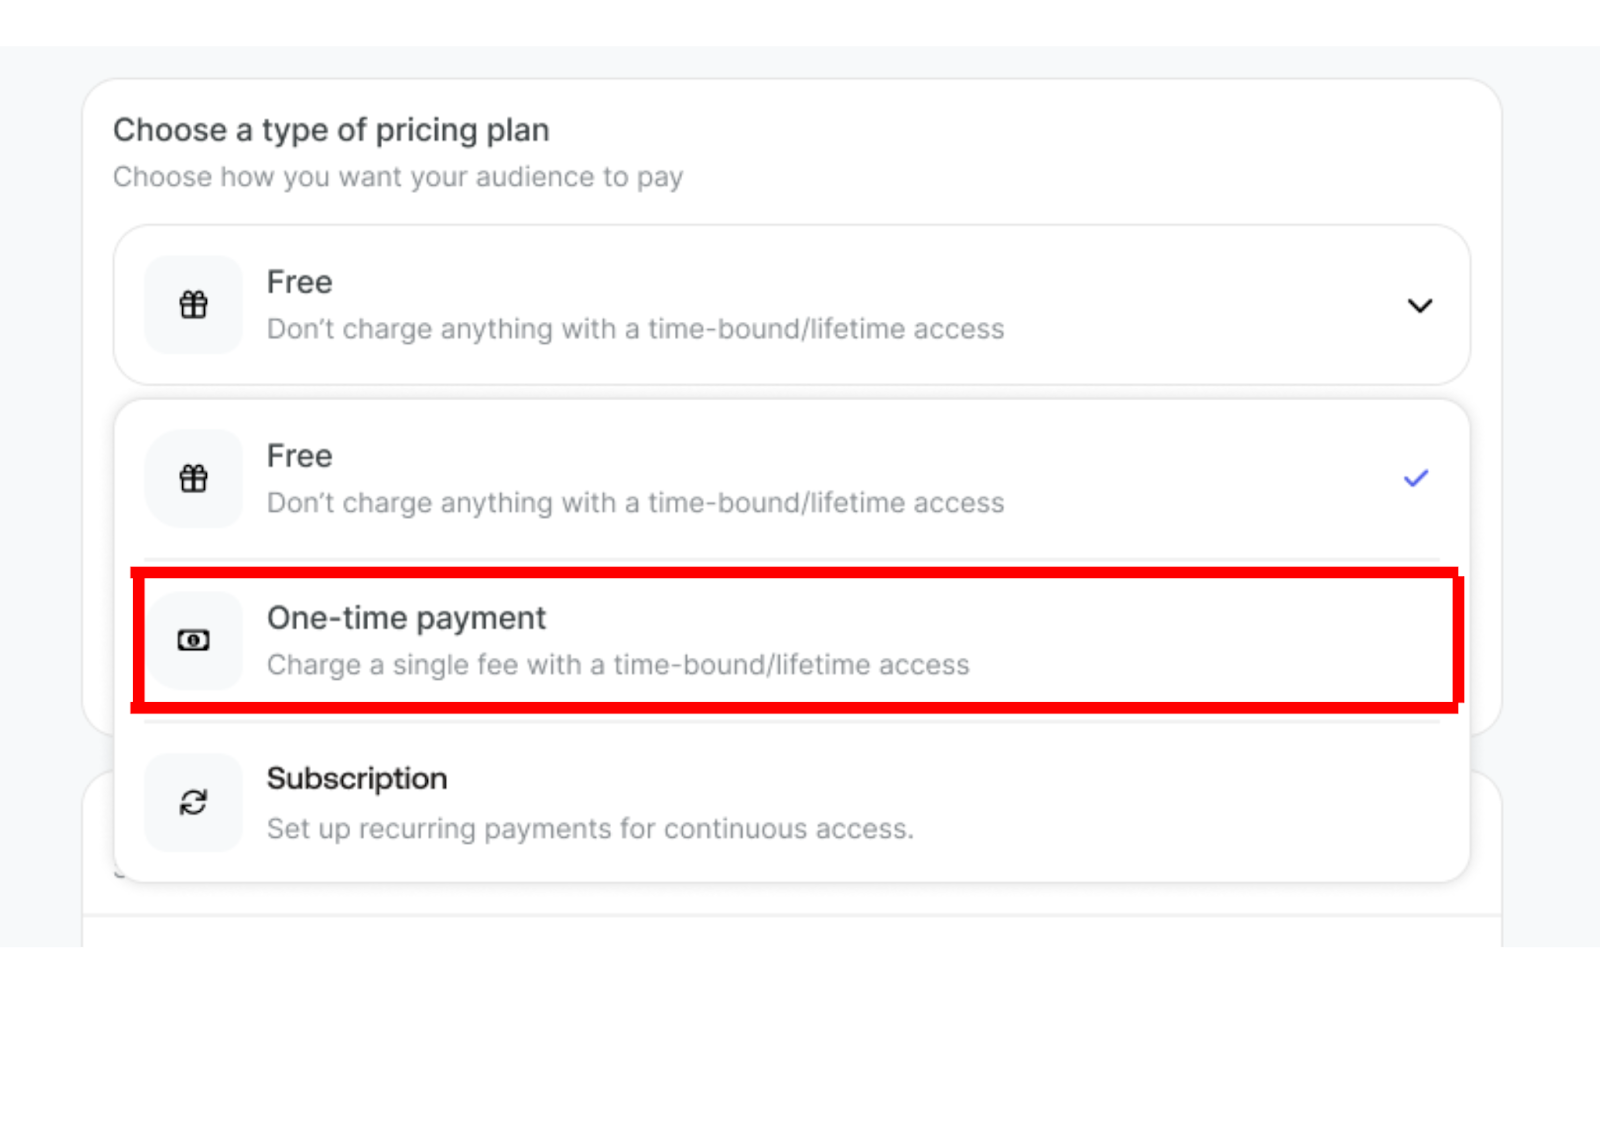
Option 2: One-time Payment
Description: Charge a single fee with a time-bound/lifetime access
Use this when you want to:
Run one-time workshops or masterclasses
Provide limited-time access to content
Host special events
Option 3: Subscription
Description: Set up recurring payments for continuous access. Build your uninterrupted revenue stream every month.
Use this when you want to:
Create recurring revenue (steady, predictable income)
Deliver ongoing content regularly
Offer monthly/quarterly/annual memberships
Provide continuous community access
You can create up to 6 different pricing plans for each Telegram community.
Step 1: Creating a Free Plan
Step 1: In the "Choose a type of pricing plan" section, click on "Free"
Step 2: Configure the access duration:
Time-bound access: Set a specific period (7 days, 1 month, etc.)
Lifetime access: Members get permanent access without any charges
Step 3: Enter your plan details:
Plan name: Give it a descriptive name like "Free Trial", "Free Access", or "Community Member"
This name will be shown to your audience
Step 4: Click "Save" to create the free plan
Step 2: Creating a One-time Payment Plan
Step 1: In the "Choose a type of pricing plan" section, click on "One-time payment"
Step 2: Fill in the plan details:
Plan name: Enter a clear name like "Lifetime Access" or "Workshop Pass". This name will be shown to your audience.
Price: Enter the amount you want to charge
Sale price: Enter a discounted price if you're offering a special rate (optional)

Choose country: Select your country to set the currency
Step 3: Set the access duration:
Lifetime access: Members pay once and get permanent access
Time-bound access: Members pay once for access for a specific period
Step 4: Configure transaction fees:
Charge transaction fee: Toggle this option to decide who pays the payment gateway charges:
Toggle ON: Your audience pays the transaction fee
Toggle OFF: You cover the transaction fee
You'll see:
Effective price: The actual price including all fees
You will receive: The amount you'll get after deductions
Step 5: Click "Save" to create the one-time payment plan
Step 3: Creating a Subscription Plan (Recurring Revenue)
What is Recurring Revenue?
Recurring revenue means your members are automatically charged at regular intervals (weekly, monthly, quarterly, or annually). Instead of a one-time payment, they pay repeatedly for continued access. This provides predictable, steady income.
How to Set Up a Subscription Plan
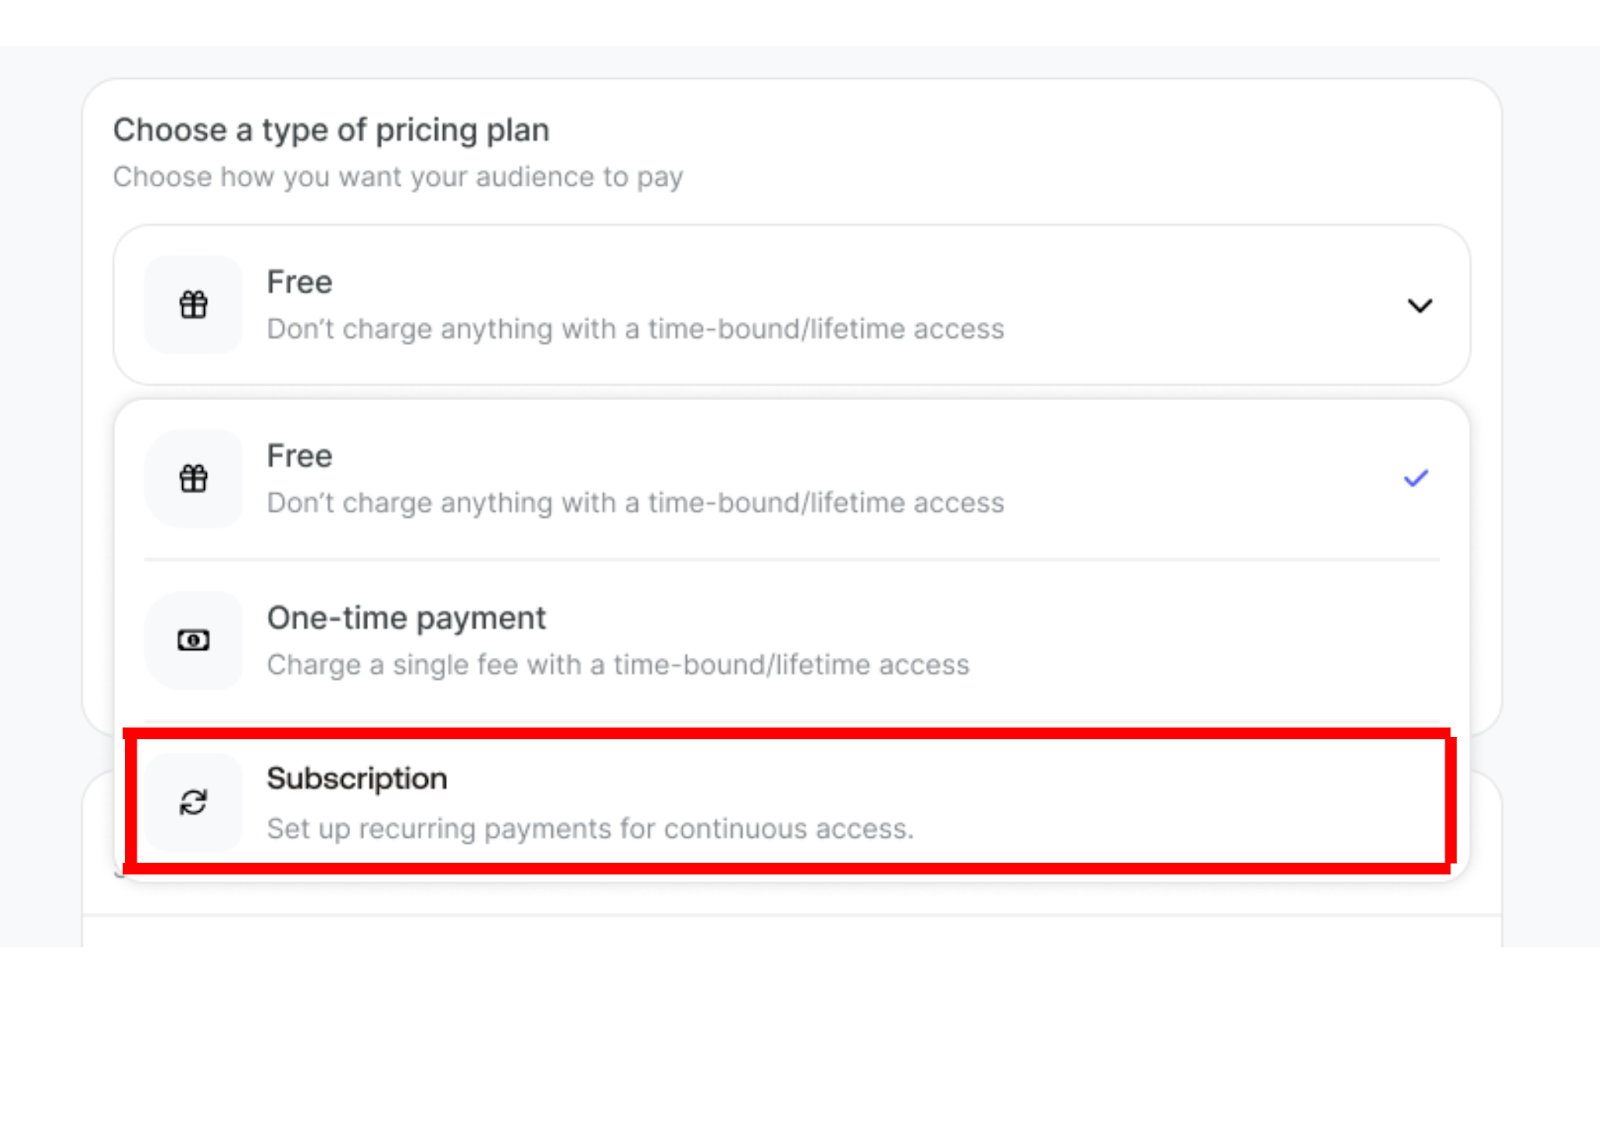
Step 1: In the "Choose a type of pricing plan" section, click on "Subscription"
You'll see the message: "Set up recurring payments for continuous access"
Step 2: Fill in the plan details:
Plan name: This name will be shown to your audience. Enter a descriptive name that clearly indicates the billing frequency.
Step 3: Set your pricing:
Price: Enter the amount you want to charge per billing cycle
Sale price: Enter a discounted introductory price (optional)
Choose country: Select your country to set the appropriate currency
Step 4: Configure billing frequency:
Bill Every: This determines how often members are charged.
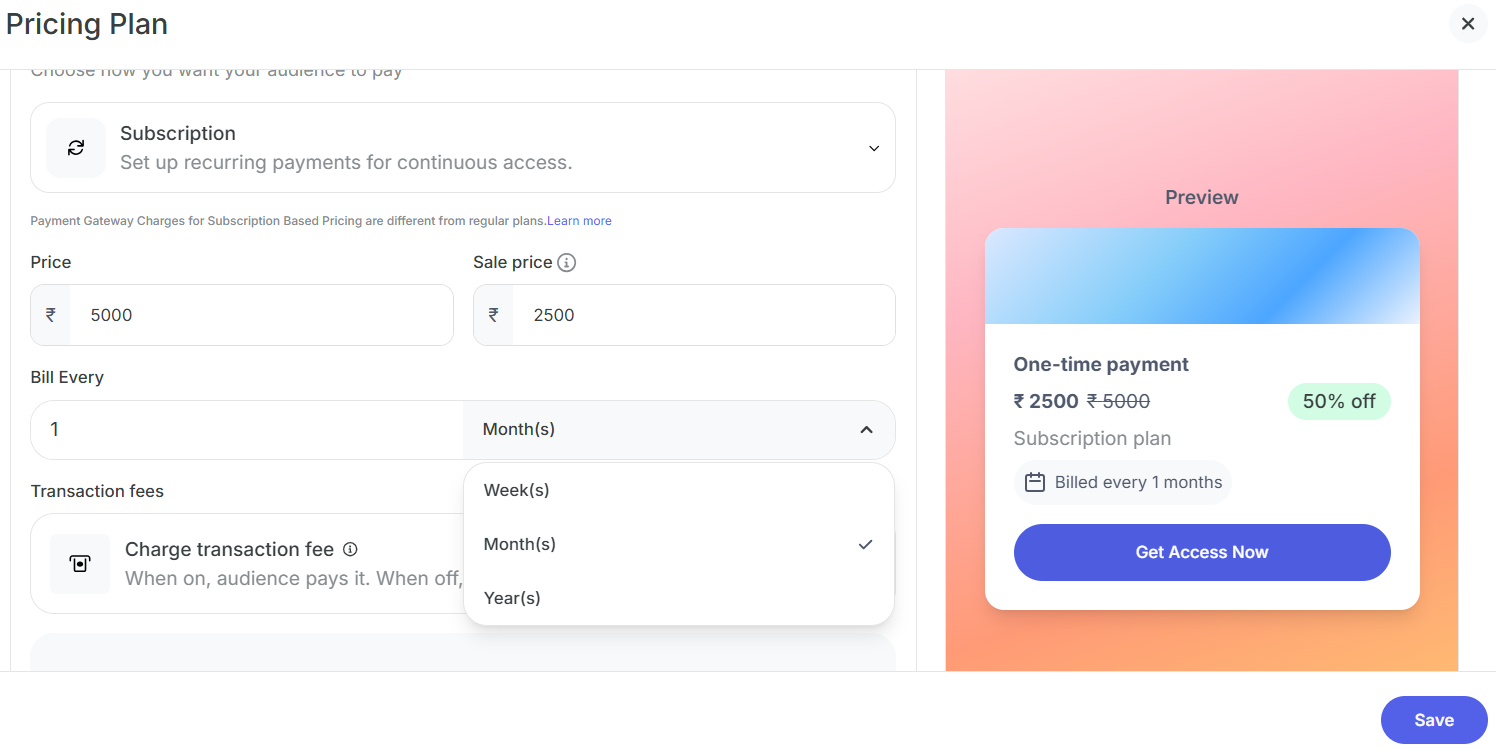
Enter a number and select the billing period from the dropdown:
Available Billing Frequencies:
Week(s)
Bill every week or multiple weeks
Month(s)
Bill every month or multiple months
Most popular option
Year(s)
Bill annually or multiple years
Step 5: Configure transaction fees:
Charge transaction fee: Toggle to decide who pays the payment gateway charges.
Important Note: Payment Gateway Charges for Subscription Based Pricing are different from regular plans.
Toggle ON: Audience pays the fees
Toggle OFF: You cover the fees
Effective price and You will receive the calculations after all fees.
Step 6: Review the preview:
On the right side, you'll see a live preview showing:
Plan name
Price per billing cycle
"Subscription plan" label
Billing frequency
Step 8: Click "Save" to create your subscription plan
Creating Multiple Pricing Plans
You can create up to 6 different pricing plans for a single Telegram community.
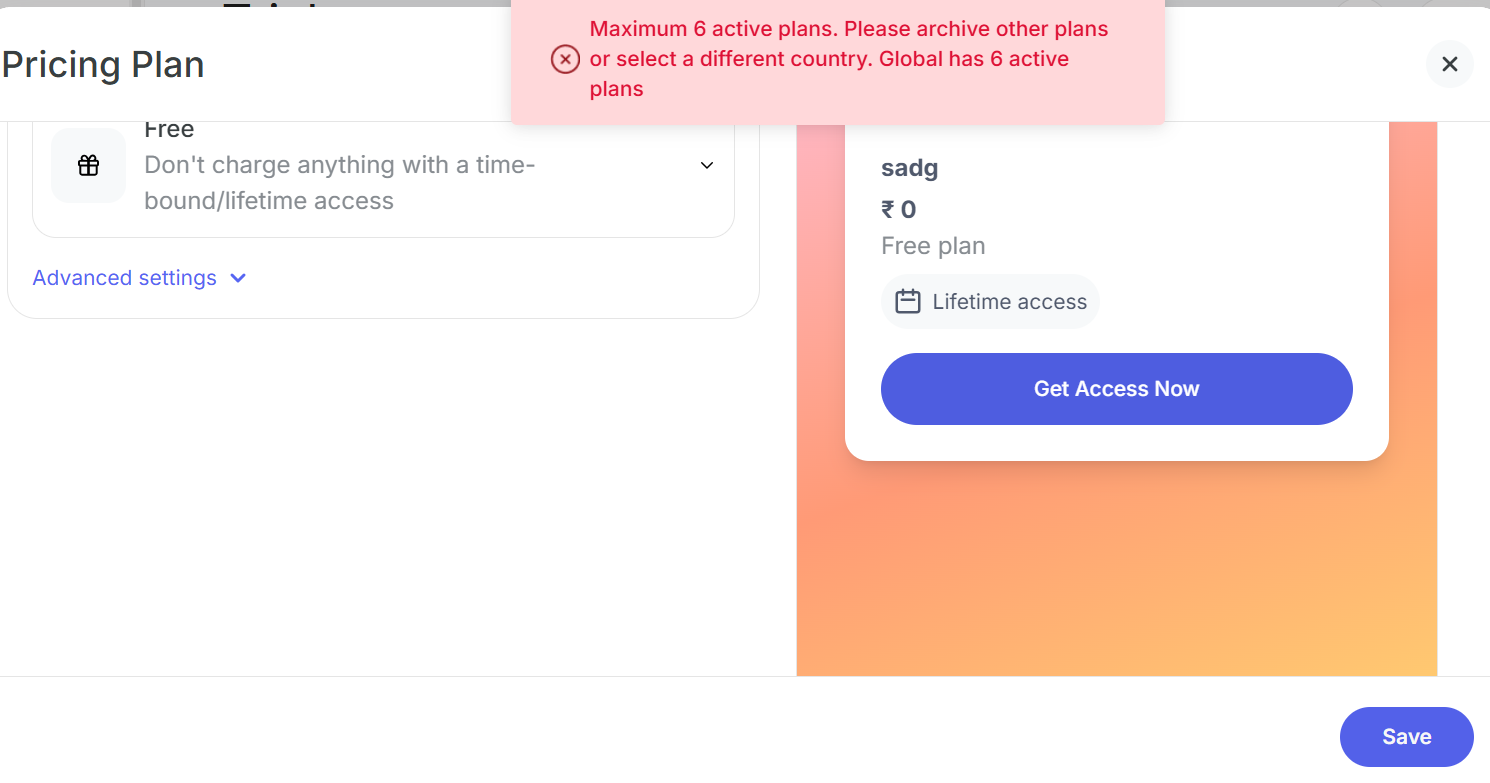
Important: If you try to create more than 6 plans, you'll see an error message: "Maximum 6 active plans. Please archive other plans or select a different country. Global has 6 active plans"
To create additional plans, you'll need to either:
Archive existing plans that are no longer needed
Use plans from a different country (if offering region-specific pricing)
How to Add Multiple Plans
Step 1: After creating your first pricing plan, click "Add another plan" or navigate back to the pricing setup
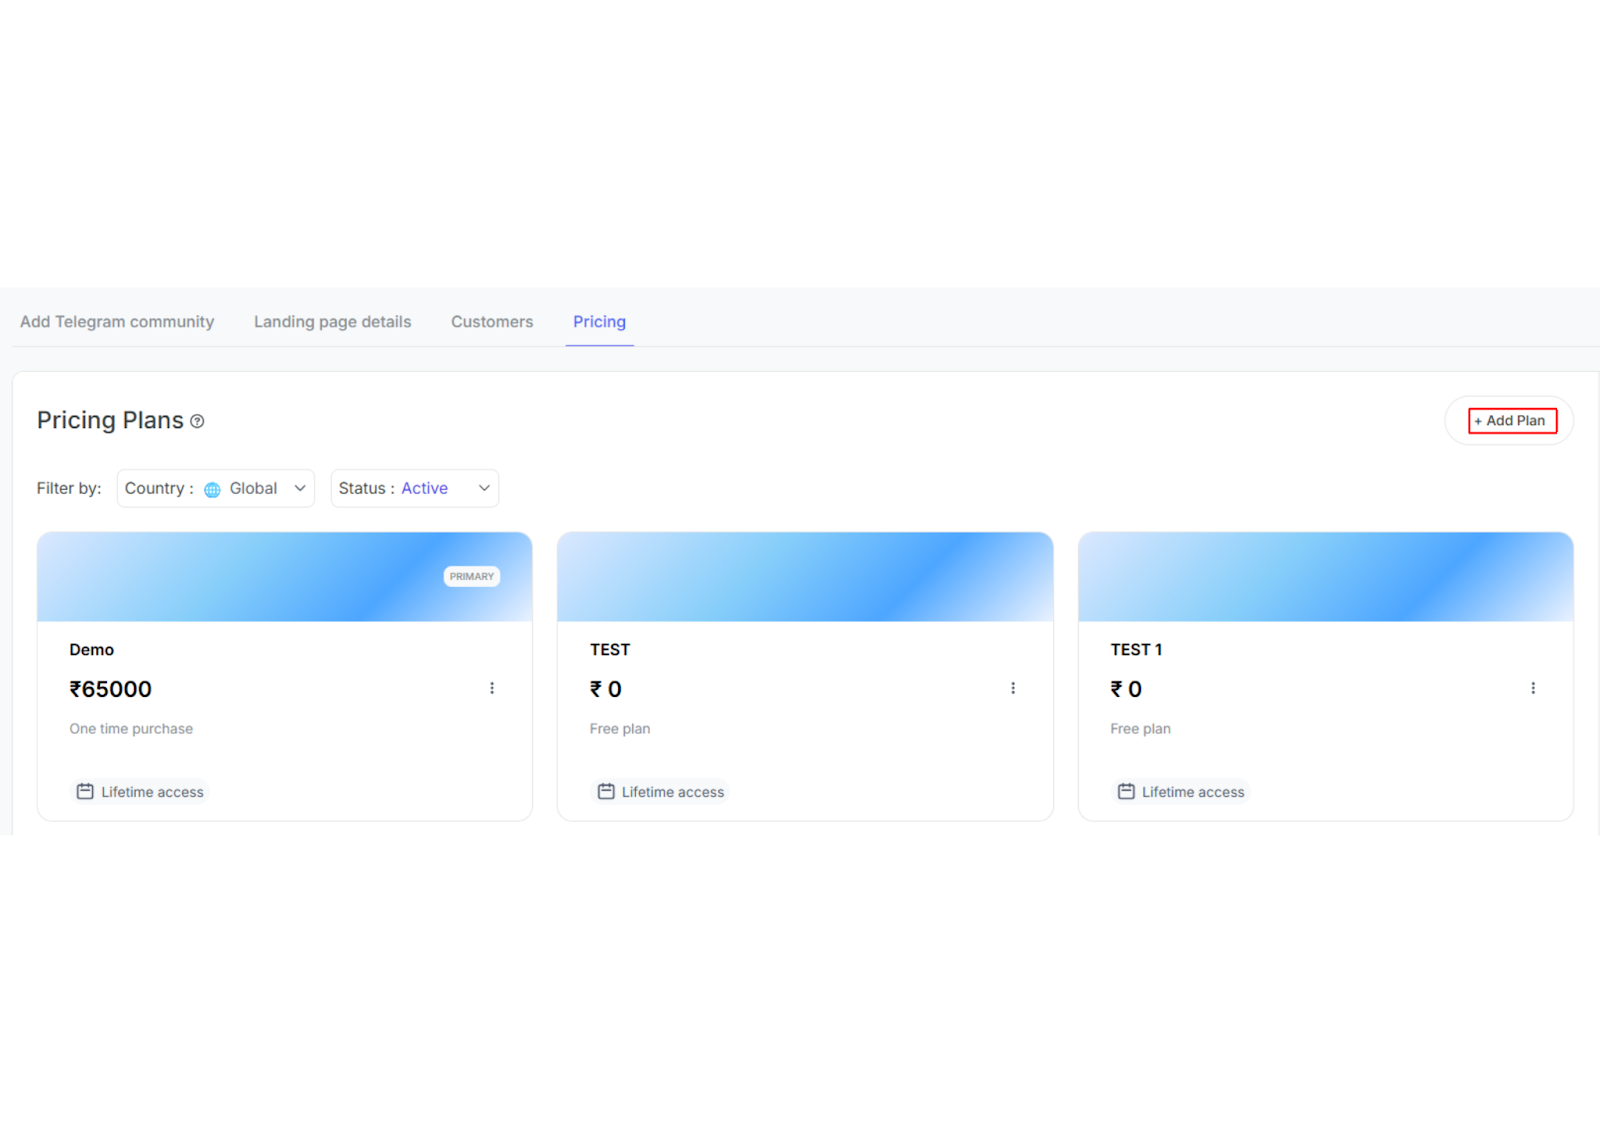
Step 2: Repeat the process to create another plan with different:
Plan name
Pricing model (Free/One-time/Subscription)
Price points
Billing frequency (for subscriptions)
Step 3: Up to 6 plans can be active simultaneously
Step 4: Members will see all available plans and can choose the one that fits them best
Step 5: If you need to add more than 6 plans:
Navigate to your pricing plans list
Select plans you want to archive
Click "Archive" to make room for new plans
Archived plans are not visible to new members but existing subscribers remain unaffected
Next Steps After Creating Pricing Plans
Once you've created your pricing plans:
Preview your plans using the preview panel
Click "Publish" to make your community live
Share your community using the share options
Monitor which plans are most popular
Adjust pricing based on member feedback
Was this article helpful?
Start creating your pricing plans and monetize your Telegram community today!
Was this article helpful?
That’s Great!
Thank you for your feedback
Sorry! We couldn't be helpful
Thank you for your feedback
Feedback sent
We appreciate your effort and will try to fix the article